Tag Archives: LAN

Distributing the Internet in your home

So your Internet provider has left you with some electronic devices, and maybe an antenna on the roof. In many cases it is connected to one of your home computers, so you can now get on the Internet. Now what?

Well, the first thing is to understand what you have. Typically, you have one of the following:

  1. A box inside the house with one Ethernet port that is connected directly to your computer, or
  2. A single Ethernet cable snaking in from outside the house and connected directly to your computer (actually, there is usually a little black box in the middle somewhere, plugged into the wall), or
  3. A box inside the house with several Ethernet ports and usually a wi-fi Access Point.

Most new Cable, DSL, Cellular, and Satellite installations will include a “combination” box (modem and router) which most closely resembles #3. This makes building out your network easier, in most cases, because it includes a router.

2Wire combination router

Most older Cable, DSL, and Satellite installations (and some new ones) just include a “modem” and resemble #1, while most Fixed Wireless installations include a radio (attached to the house) that most closely resembles #2. If your situation is like #1 or #2, you need to install a router to build your Local Area Network (LAN) and enable multiple machines to access the Internet simultaneously.

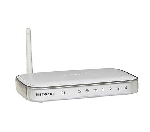
Netgear router

Inexpensive Netgear router

Routers are very inexpensive and pretty easy to configure. In general, there is no advantage to getting a more expensive router – good routers are available for about $35 from Amazon.com or Ebay (about $50 if you drive into town and go to the store; Wal-Mart, Target, and Best Buy all carry routers and Ethernet switches). The extras that drive up the price of routers are:

  1. Advanced wi-fi features – “N” wi-fi and dual-band (2.4 and 5.8 GHz) wi-fi are the main ones; sometimes useful if you have a very large house, but I have found that setting up a separate wi-fi access point provides better service. Wi-fi from your router just doesn’t have enough range to be very useful in a rural setting, in my opinion.
  2. Network server applications, like USB file sharing – nice, but I think it’s better to have a dedicated device for this kind of thing.
  3. Advanced security (firewalls, filters, etc.) – again, kind of nice, but a real pain in the butt to configure correctly and, honestly, the likelihood that you need this sort of security (or that it really provides more security for your network than you get from the $35 router) is very, very low.

I have tried routers from Linksys, D-Link, and Netgear. The last few I have bought have been Netgear routers (including the “3G” router I have in my car with the Verizon Air Card – more about that another time), because they are the most flexible of the “consumer-class” routers. There are certain things you can do with the Netgear routers that you can’t do with Linksys or D-Link routers. However, I should say that I have also had some reliability problems with Netgear routers; they cost $35 last time I checked on Amazon.com, and I’d suggest buying two.

Once you get your router and get it set up, you’ll have (typically) four Ethernet ports and a wi-fi access point, so you can now attach many more devices to your network and access the Internet from any of them. The obvious things to connect are more computers (desktops, laptops) and smartphones (I have an iPhone; it’s a pretty good phone, albeit crippled by AT&T’s service, but it’s a REALLY great wi-fi device), but just about everyone is going to have wi-fi enabled iPad-type devices soon, and there are a lot of other useful things you can put on the network once you have it up and running.

So, where are we going with this?

Laptop in workshopIn the following posts, I’ll be describing things I am doing around my house and the things I have done to make them work. Some of these things are obvious (I hope), and some of them will seem ridiculous (I expect). So it’s a good time to just explain exactly where I’m going with this.

The overall goal is simply this: to build a single communications network that will allow me to (1) access the internet at reasonable speed, and (2) build out systems for security, monitoring, and automation on my homestead.

The first step is to get on the Internet with a good, “always-on” high-speed Internet connection. Speed is good; there are times when you will use all the speed you have and wish for more. However, the “always-on” aspect is much more important, because it allows you to do things on the Internet (like back up your hard drive) automatically, even when you’re asleep. Dial-up is useful for checking email, but not really for anything else. I kept a dial-up account for several years after I got “broadband” internet for use on the road or if the broadband went out, but I never used it. Wi-fi hotspots are widely available, I have a Verizon Air Card for emergencies, so dial-up doesn’t work into my plans.

The second step is to make the Internet available to all the computers in the house. To do this, I installed a router connected to the DSL modem in the house. Later on, I upgraded to AT&T U-Verse, and they replaced the DSL modem with a new unit with a built-in router. Almost all consumer-grade routers have a 4-port Ethernet switch and a wi-fi access point built-in, so you can connect several computers or other devices to them. As I mentioned in an earlier post, I had Ethernet cables running to five rooms of the house (living room, kitchen, my office, my wife’s office, and the bedroom), so I attached a 5-port Ethernet switch to my router to give myself a total of 7 ports (one port on the router and one port on the switch are occupied by the cable connecting them). In my house, 5 ports are connected to the Ethernet cables running in the house (although devices are now only plugged into one of those ports, the one that goes to my office; my wife has gone “all wi-fi” and I never did have anything plugged into the living room, kitchen, or bedroom ports except for testing or for guests to use). One port is connected to an external wi-fi access point, which we’ll talk about later, and one port is used for a “wired” IP camera.

The router serves to make the Internet available to everyone in the house, but it also creates a “Local Area Network” (LAN) in the house, enabling all the devices in the house to talk to each other and to the Internet. It’s not entirely obvious why this is useful until you start to think about all the things you can put on a LAN. To start with, I got a Network Attached Storage (NAS) device so we could back up our computers and store shared files. I then added the IP camera to keep an eye out the front of the house. I got a Lexmark networked printer so we can print from anywhere in the house (haven’t gotten the dog to go fetch the printouts yet, which is probably just as well), and, of course, there are always about 20 “experiments” (currently focusing on automation) attached to the network (usually safely inside my office or the workshop).

The next step was to extend the network out into the outbuildings, particularly our workshop. The wireless router just doesn’t have the “oomph” to reach out to the workshop, never mind beyond that, so I set up an external wi-fi Access Point. I actually set up a “meshing” system with an access point on the house and another one in the workshop, primarily because I thought it was interesting. With this system, I can use either wi-fi or “wired” (Ethernet” devices out in the shop, even though I don’t have an Ethernet cable running from the house to the shop (Ethernet cables are limited to 100 meters, which would reach to my shop, but I really don’t want to run the trench, bury the conduit, etc.) Recently introduced, low-cost meshing wi-fi systems are, I think, a real necessity for folks who live on property, and I’ll explain why later.

The final step (and it’s never going to be “done,” of course) is to use that network to make business easier and make the household safer, more secure, and more fun. I have been messing around with IP and wi-fi cameras for monitoring things on the property, and I have several hooked up for testing as I write this. Most of them are just cheap cameras from Ebay, but I have one little Axis camera (the M1011-W) that has helped me understand the difference between cheap IP cameras and good IP cameras.

My other goal, of course, is to help you do this (whatever parts of it you want to do, or wherever you want to extend my experience) as easily as possible. I’d like to think that I have made every mistake possible; while that’s not true, I have made a lot of mistakes and made a few good decisions. I hope that, by sharing those with you, I can help you avoid the mistakes and frustration that I experienced.

Gettin’ rural with it…

Up to now, honestly, everything I have written about is equally applicable to anyone, rural or urban. But this is where that ends…

If you live in town, once you have a network that spans your house and yard, you’re pretty much done. You might want to put up cameras around the house or link in your watering system so you can control it over the internet, but, once you have the router set up, the network-building part is finished.

If you live in the country, though, you typically have a house, a garage, a workshop (or two), offices, barns, stables, and a wide variety of other possible outbuildings, as well as fields, storage facilities, waterways, etc.

Your $35 wireless router will not reach all these places, and a $200 router will only do slightly better. Nor is “hard-wiring” an option: Ethernet can only go 100 meters, and, although fiber cable can go farther, running cable is a difficult and prone to needing repair (critters seem to love cable, especially for lunch).

Wi-fi is the answer, but not the typical wi-fi router. A typical “consumer-grade” wi-fi router has an output power of 60 milliWatts (mW), or 0.06 watts, to a 2 deciBel omnidirectional antenna, which gives it an “Effective Isotropic Radiated Power” (EIRP) of about 100 mW or 0.1 Watts. If that doesn’t sound like much, that’s because it’s not – it is designed to provide a wi-fi signal inside a suburban house while not interfering with the house next door.

The Federal Communications Commission (FCC) and Industry Canada (IC), however, allow unlicensed “point-to-multipoint” stations on 2.4 GHz, like a wi-fi access point, to operate up to 1 Watt of power to a 6 dB antenna, for a total EIRP of 4 watts.

Now, 4 watts is going to go a lot further than 100 mW, and there is no restriction to how many of these higher-power devices you use. So we are faced with two problems:

  1. Where do I find a device with a whole lot more power?
  2. What do I do to get the most range out of it?

The first one is easy: there are a few companies out there building high-power, low-cost access points for the Wireless ISP (WISP) market. The second one, however, is a little tougher.

Wi-fi, at least the “b,” “g,” and “n” variants operate at 2.4 GHz (“n” can also operate simultaneously on 5.8 GHz), which is a very high radio frequency. For reference, cell phones operate at 0.8 GHz (sometimes at 1.9 GHz.), and FM radio operates at 0.1 GHz (100 MHz).

A friend of mine told me it’s best to think about it this way: the higher the frequency, the more radio waves behave like light. Lower-frequency radio waves will “bend” around or pass right through obstacles, but high-frequency radio waves will be weakened (“attenuated” is the technical term) by any solid objects. How much they are attenuated depends on the object, but, in general, the more solid, dense, and metallic the object, the more it will attenuate the signal. Metal is the worst – it is possible to build a structure with metallic mesh that you can see through but will stop almost all radio emissions from entering (called a “Faraday Cage“)

So, to get the best range from your wi-fi access point, you want to have it outside, so it doesn’t have to pass through the walls of your house.

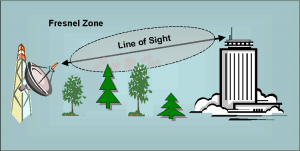
However, the radio waves don’t all follow a completely straight line from transmitter to receiver – it turns out that they are distributed in the air in a football-shaped regionFresnel zone image between the transmitter and the receiver called the “Fresnel Zone.” For short distances, the Fresnel Zone is not that important, but, once you get out over 100 yards or so, it becomes increasingly important: for “good” radio transmission (constant contact with the source and a good rate of data transmission) you want to have the Fresnel Zone 80% open; to just have a fairly reliable connection, it needs to be at least 60% open.

What this means, for instance, is, even if you can see the antenna above a dense stand of trees, you may not be able to access the wi-fi access point from your computer because the trees are disrupting too much of the Fresnel Zone. Indeed, if you have the access point out in the open but only 4 feet off the ground, the ground will start to be more and more of an obstacle as you get further away.

The size of the Fresnel Zone increases as the distance between the transmitter and the receiver; for instance at 2.4 GHz and a distance of 1 mile, the Fresnel zone is approximately fifty feet across.

The keys, then, to getting the a wi-fi signal out to your garage, office, workshop, and stables are:

  1. Getting a powerful wi-fi signal to start with; and
  2. Removing as many obstacles as possible from the path between your wi-fi access point and your computer.

We’ll look at that first one in the next post.

High-Power Wi-Fi

So, in order to use the Internet from all over your property, you need something a little more powerful than your typical wifi router. But what, exactly?

If you’re like me, the first thing you do is go to Google and search for “high power wifi” or “long-distance wifi” or something like that, and you get back… almost nothing useful. The searches return (at least as of the time I am writing this) numerous pages of links to industrial-grade wi-fi systems (for tens of thousands of dollars), do-it-yourself projects (“build a wifi antenna out of cans and baling wire), high-power indoor wifi routers (e.g. Bountiful and others), and high-power wi-fi adapters for your laptop (so you can access the free wi-fi at the coffee shop from a block away).

A few of the ads are for things like “high-power AP & CPE” which, believe it or not, is what we’re looking for. These ads are aimed at Wireless Internet Service Providers, who use them (usually “tweaked” so they can’t be used for wi-fi access) as Access Points (AP) and Customer Premises Equipment (CPE) – the AP goes on a tower, and the CPE goes on the side of someone’s house to provide them with an internet connection. Because this equipment is meant for use by this rather demanding but low-margin business, they are tough, weatherproof (for mounting outside), and remarkably low-cost.

You’ll see, looking at those links, that there are two general kinds; most of them are directional, which means they have an antenna that “focuses” the radio energy in one particular direction, and some of them are omnidirectional (or don’t have an antenna at all), meaning they cast the radio energy in all directions around the unit.

The funny thing is that folks usually start with a directional unit because they are thinking of getting wi-fi to a specific place (e.g. a workshop) and a directional radio is the obvious way to do that. The problem comes later on when they realize that it’s also useful to have a link to some other place (e.g. a barn) or two (garage, storage building, stable, grain bin, etc.), or just to have internet access all around the house.

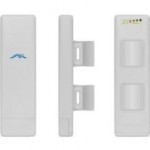
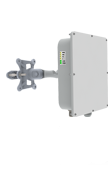
Some of these directional devices have external connectors that can be used with omnidirectional antennas. Good examples include the Ubiquiti NanoStation, the EnGenius EOC2611P, and the Deliberant AP-Solo. If you’re uncertain about how you want to proceed, these APs can provide flexibility. You can also start with one of them and simply add more in additional directions; 4-6 of them (depending on the directional gain of the antenna, pointed in various directions) create an omnidirectional signal.

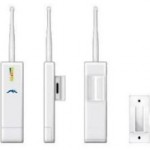
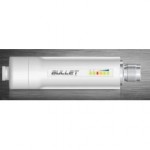
However, best of all is to simply use an omnidirectional access point; my favorites are the Ubiquiti PicoStation 2 HP Ubiquiti Picostationand the PicoStation M2; their cousins the Bullet 2 HP and Bullet M2 are similar, but comes without any antenna or power supply.

These Access Points are quite inexpensive, and they can be used up to half a mile away with a normal laptop. In addition, they have a function called “WDS” that allows you to set up additional APs as “repeaters.” This can allow you to cover a very large area with a WiFi signal, although my own testing shows that the practical limit is two repeaters. The WDS system creates a lot of network “overhead” traffic, and more than two repeaters seems to overload the network.

These high-power APs can broaden the distribution of your internet connection considerably, making a reliable WiFi signal available across your property.  But there is a lot more you can do…

The Rural WiFi Mesh Network

Just a few years ago, mesh networks were considered so esoteric that no one would even think of using one unless you had wads of money and a cadre of geeks at your beck and call. The notion of someone using a mesh network to provide rural WiFi on a farm would have been laughable.

Some years back, though, those clever kids at MIT decided they wanted a mesh network across the campus (and beyond) at the lowest possible cost. The result was RoofNet, which eventually gave rise to a commercial offering from Meraki and, later, Open-Mesh and, eventually, AyrMesh. These mesh networks all use low-cost WiFi radios and the internet in clever ways to provide a very flexible WiFi “cloud.”

What’s a mesh network?

A mesh network uses multiple Access Points (called “nodes” or “hubs”) which communicate with each other via wireless links. WiFi MeshOne or more of these nodes may be connected to the Internet; they are usually called “Gateway” nodes. Nodes at the outer edge of the network are referred to as “Leaf” nodes, and nodes between the Gateway and the Leaf nodes are frequently called “Repeaters.”

The major features of a mesh network are:

  1. Practically unlimited expansion – you can use mesh nodes to extend your network around all kinds of corners: into buildings, around physical obstacles, and, potentially, across large distances
  2. Simple networking – the mesh can present as a single network, so anything in the network across a broad area can be addressed via its IP address
  3. Easy maintenance and administration – modern mesh networks like the ones we are discussing here use a central “dashboard” on the internet to manage the nodes, so you never have to go out and “touch” a node (unless it physically fails).

Of course, while a mesh network can be expanded almost arbitrarily, it requires additional mesh nodes to do so. One of the most extraordinary things about the mesh systems mentioned earlier is that the nodes are quite inexpensive – from less than $100 apiece to a few hundred. Besides requiring enormous technical expertise, previous mesh networks cost thousands of dollars per node.

The upshot is that, while mesh networks were previously only for the military and large companies, they are now perfectly suitable for your farm or homestead.

A mesh network of a single node is, essentially, equivalent to a single access point. You connect it to an internet source and turn it on, and it behaves much like a wireless router. The big difference is that you can simply install more nodes to “repeat” or “relay” the signal to different areas: further away and around obstacles to line-of-sight. You can also use those additional nodes to connect “wired” devices into the network by plugging them into the Ethernet ports of the nodes.

This makes the mesh network an extremely useful and practical tool for building your “Farm-Area Network.” A mesh network may not be the “be-all and end-all,” and you may still want to use point-t0-point links and directional clients to expand your network. But I believe that a mesh network on the farmstead  is the right place to start.